
Connecting to Salesforce and Mailchimp using Talend
A lot of companies use Salesforce to manage their customers and contacts. In addition Mailchimp can be used for sending out mailings to these connections. Mailchimp also captures information about what people did with these mails. This can be useful information for your CRM. A while ago, I was asked to make a list of everyone that have opened their mails in Mailchimp. Let me show you how easy it is, to do something like that with Talend.
In Talend:
- we can get a list of email addresses from Mailchimp of receivers that opened a mail
- and we can ask Salesforce for the email addresses and names of all our connections
- and we can also use a mapping component to join these lists.
Talend has a standard interface with Salesforce. And Mailchimp offers lots of RESTful web services, which we can make use of in our Talend job.
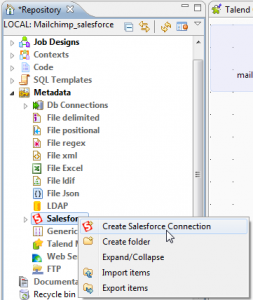
- Connecting to Salesforce
Right click “Salesforce” under the Metadata and choose “Create Salesforce Connection”.
After choosing a name for our connection, all we need to fill in, is the username and password for our Salesforce-connection. The rest is already filled in for us.
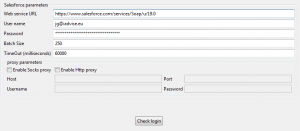
To enable the “Finish” button, we need to check our properties first, using the button “Check login”.
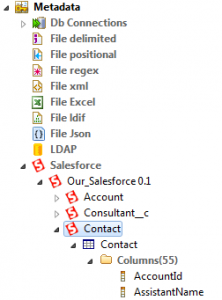
Under Metadata, we can now browse through all our Salesforce-data.
Now you’re probably wondering, how to use this data in your ETL-flow. Well.. that’s even easier!
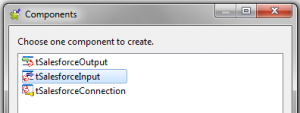
Simply drag one of the tables (with the blue icons) into your job and choose for the “tSalesforceInput” component from it’s 3 suggestions.
After specifying the necessary mappings you should get something like this:
We’ve used Contact and Account data of Salesforce for this.
In the next part, let’s check out how we generated the list of email addresses.
2. Connecting to Mailchimp
Accessing your Mailchimp-data, is a bit harder. We need two components from the Talend-palette:
The ‘tRest’ component, because we need to use a RESTful webservice for requesting our data from Mailchimp. And the ‘tExtractJSONFields’ component for interpreting the data we receive back.
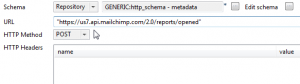
After dragging the tRest component to your job, choose ‘POST’ as the ‘method’ and fill in the URL, corresponding to the report you wish to receive.
If you want to receive your report in XML-format instead of JSON, just add “.xml” at the end of the URL.
Here we needed the Mailchimp report, that gives us information on opened emails.
If you are interested in other kinds of reports, you can find the list here:
http://apidocs.mailchimp.com/api/2.0/#lists-methods
Every request, needs certain parameters. We can specify them in the HTTP body field, like this:
“{\”apikey\”: \”your api key will be here\”,\”cid\”: \”put a campaign id here\”}”
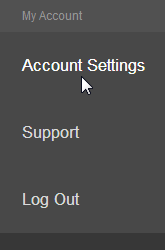
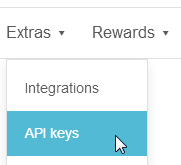
The API-key will always be needed as the first parameter. You can find it in Mailchimp under your ‘Account Settings’ – ‘Extras’ .
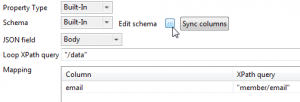
The second component we need, is called ‘ExtractJSONFields’. After dragging it to our job, we link our first component to it.

We can use ‘Edit schema’, to define the data we want to extract.

Finally all we need to do, is specify the location of this data we are interested in, for example the ’email’-field inside the ‘member’-field.
Now that we’re able to access our data from Mailchimp, let’s take a look at how we used it for generating the list of e-mailaddresses.
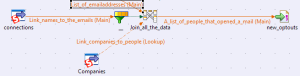
First we asked Mailchimp for all our Campaigns, then we used the ‘flowToIterate’-component so we could ask Mailchimp for the email addresses, once for every campaign in the list:
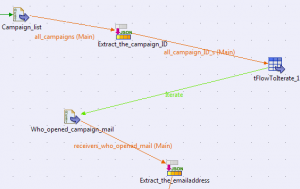
Finally all we had to do, is put these two jobs together and press ‘run’.
So.. I hope you’ll enjoy it, as much as I did!