The traditional way to run Talend jobs is to setup an execution server and schedule the execution using the Talend Administration Center or third-party software like Jenkins. A bit newer is the ability to move the execution to the Cloud. Nothing new here.
Since the release of Talend 7.0 there is a third option, though. Talend lets you build Talend jobs within Docker images. By shipping a job in a container we now have the possibility to deploy integration jobs anywhere.
In this blog we will build a Talend job as a Docker image and run it on Elastic Container Services (ECS) provided by the Amazon AWS platform. We will also setup Apache Airflow to schedule the execution of the job.
This article gives a high-level overview of the steps needed to run a Talend job on AWS ECS; it is not a step by step tutorial.
Requirements:
- AWS access;
- Talend version 7.x.x;
- Basic knowledge of Talend and AWS.
Talend job
Before we start we want to briefly show the Talend job that is subject of the containerization.
The Talend job pickups a file that contains orders with orderliness from an S3 bucket and writes the contents to a Postgres database on AWS. The Talend job looks like this:
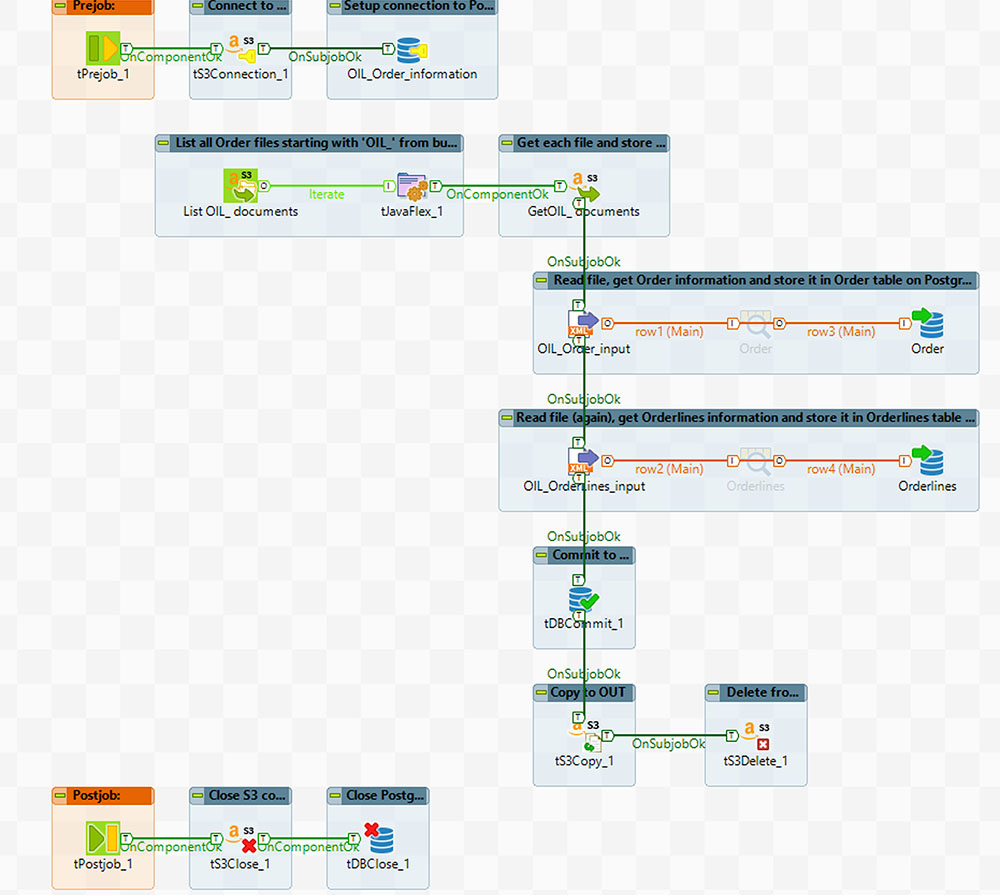
It is pretty self-explanatory. Off course we need access to a S3 bucket and to the database, but let’s assume that has been setup correctly.
Steps to run the Talend job
Our end goal is to run the Talend job on ECS scheduled in Airflow using a Directed Acyclic Graph (DAG). These are the necessary steps to succeed:
- Create repository
- Publish and export to Registry;
- Create task definition (including create container)
- Set up Apache Airflow
- Schedule using DAG
Create repository
On AWS platform create a repository in the Elastic Container Repository to be able to send the image of the Talend job to.
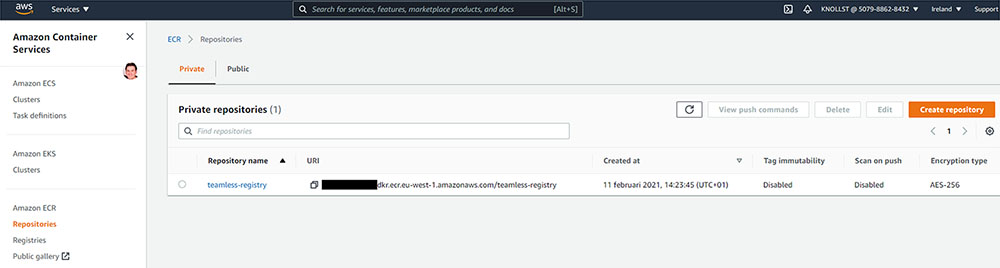
In the example the name teamless-registry is actually a repository. A more appropriate name would be ‘{jobname}_repository’.
Publish and export to Registry
In Talend the option to ‘Push Docker Image to Registry’ can be found by right-clicking the job in the Repository and then clicking on the ‘Publish’ option. In the new window select ‘Docker Image’ as the ‘Export Type’. In the next window set the right ‘Docker Options’, as shown below:
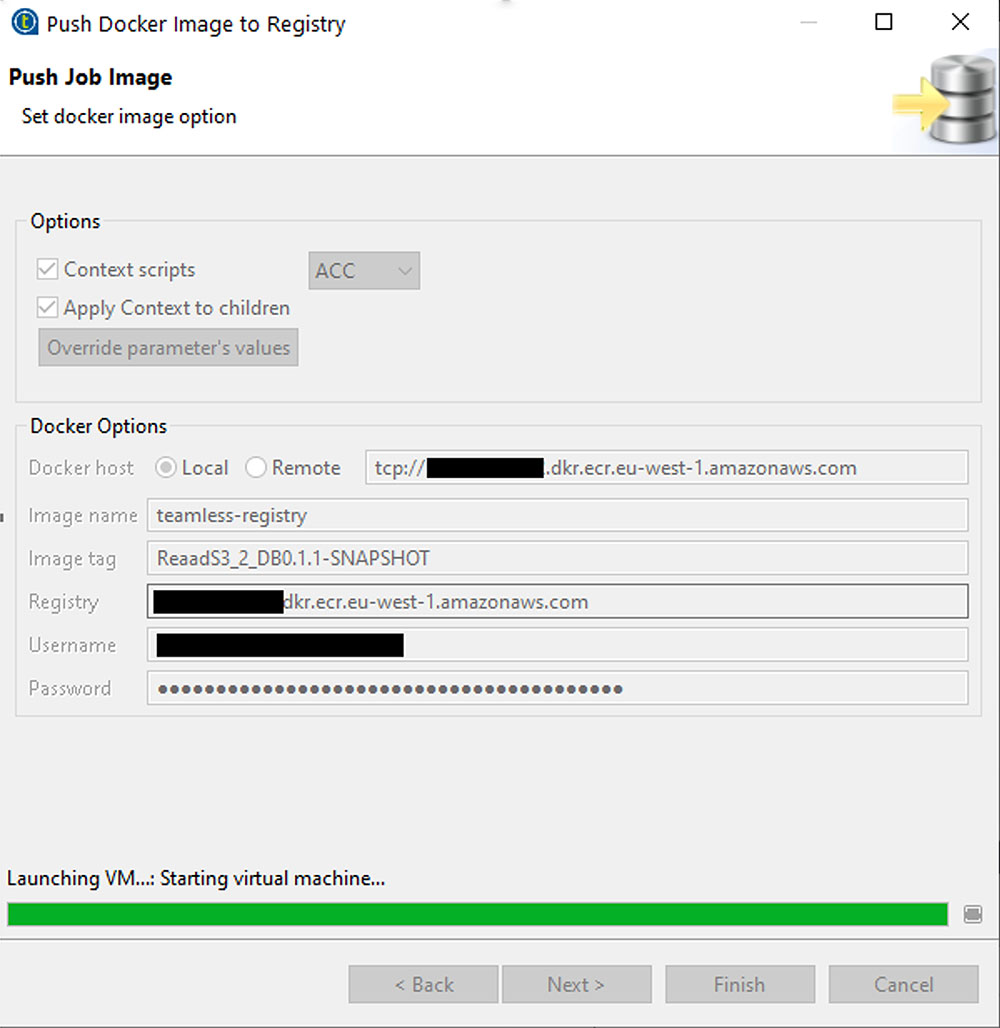
We used ‘Local’ as Docker Host, so I local Docker Hub needed to be active.
Create task definition (including create container)
To run the job we need to create a task definition and as part of this definition we need to create the actual container for the job.
On AWS open the ‘Elastic Container Service’ service and go to the ‘Task Definitions’.

Click on the blue button ‘Create new Task Definition’ and select ‘FARGATE’ in the next screen. Then click Next Step and set some details about the task definition.
On this same screen click on the ‘Add container’ button:
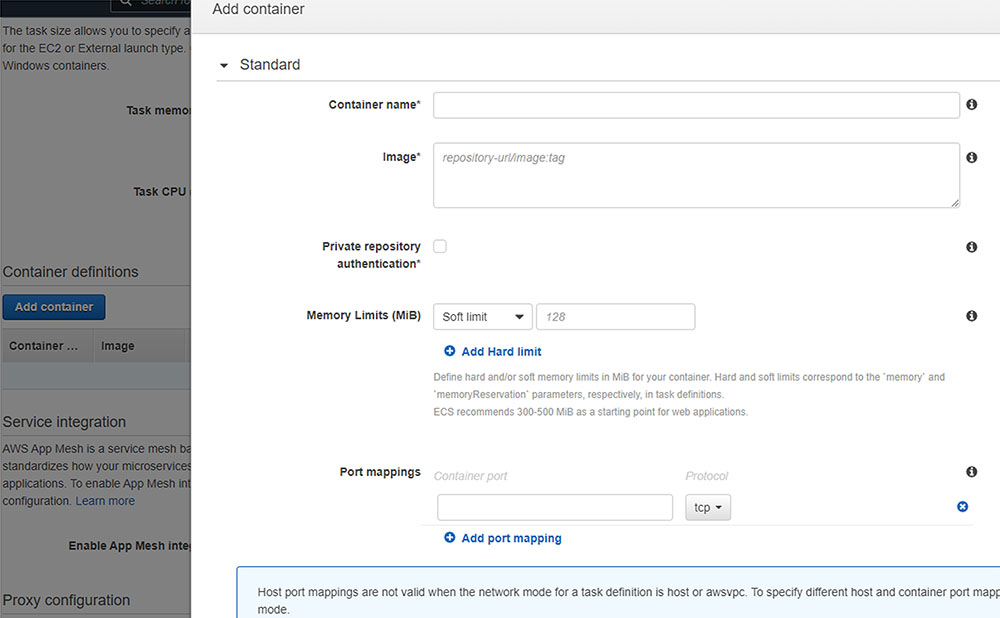
Choose a Container name and in the Image part fill in the path of the previously create repository. As seen below:

At the end ‘:latest’ makes sure to always run with the newest published job. It is also possible to point to a specific version if needed.
Set up Apache Airflow
To set up Apache Airflow you need to find the AWS service for Airflow first. This service is under the Application Integration group in the services screen. Alternatively use the search box, type ‘Managed Apache Airflow’.
The initial setup of the Airflow environment takes you through multiple steps, the most important one is shown here.
You want to make sure that the selected execution role has access to the ECS to enable the Airflow environment to start and stop containers from ECS.
Creating the environment might take a while depending on the selected cluster size. In our example we create a small cluster.

To open the Airflow environment after the creation is finished, click the ‘Open Airflow UI’-button.
Schedule using DAG
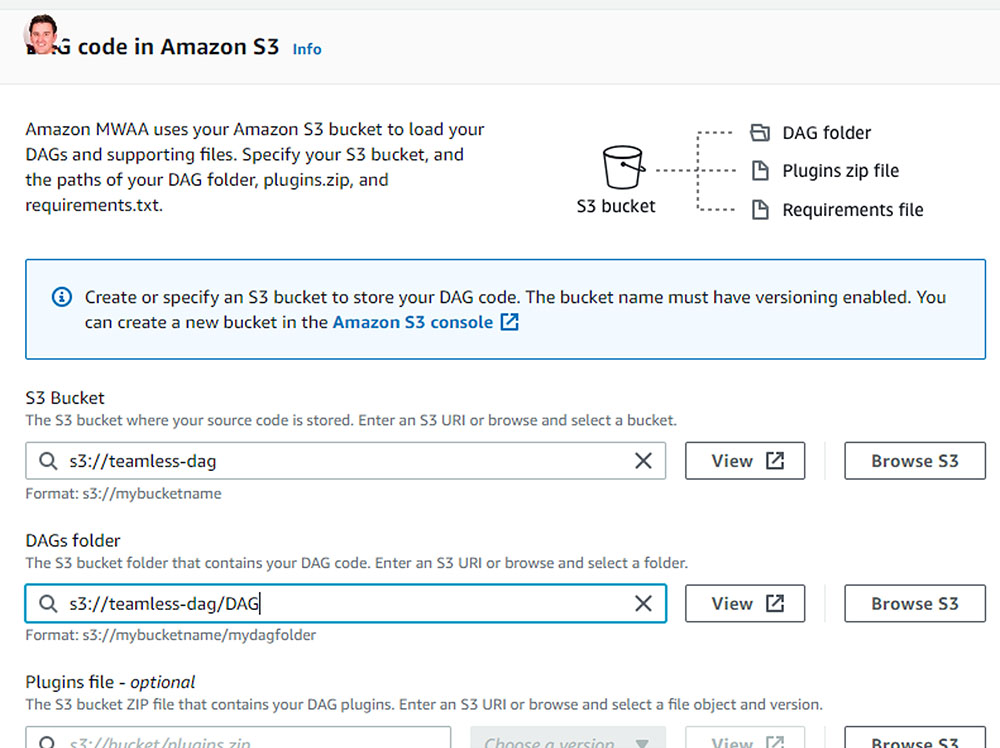
We configured the Airflow to look for DAG-files in a specific S3 bucket in the ‘DAG’ folder. We now have to setup some variables to use in the DAG-file and place a proper DAG-file in that folder.
To setup the variables, go to the Airflow UI and create them under Admin->Variables. These variables are used in the DAG-file, for example ‘AwsRegionName’.
An example of a DAG-file can be found below:
from airflow import DAG
from airflow.models import Variable
from airflow.contrib.operators.ecs_operator import ECSOperator
import copy
from datetime import timedelta, datetime

# Airflow Variables
awsRegionName = Variable.get('AwsRegionName')
awsCluster = Variable.get('AwsCluster')
awsTaskDefinition = Variable.get('AwsTaskDefinition')
awsNetworkSubnet = Variable.get('AwsNetworkSubnet')
awsContainerName = Variable.get('AwsContainerName')
AIRFLOW_ECS_OPERATOR_RETRIES = 2

default_args = {
    'owner': 'ml-pipeline',
    'depends_on_past': False,
    'retries': 0,
    'start_date': datetime(2021, 3, 25),
    'catchup':False
}

# DAG base information
dag = DAG(
    dag_id='ml-pipeline_demo',
    default_args=default_args,
    schedule_interval='@daily',
)

# ECS Args
ecs_operator_args_template = {
    'aws_conn_id': 'aws_default',
    'region_name': awsRegionName,
    'launch_type': 'FARGATE',
    'cluster': awsCluster,
    'task_definition': awsTaskDefinition,
    'network_configuration': {
        'awsvpcConfiguration': {
            'assignPublicIp': 'ENABLED',
            'subnets': [awsNetworkSubnet]
        }
    },
    'awslogs_group': '/ecs/' + awsTaskDefinition,
    'awslogs_stream_prefix': 'ecs/' + awsContainerName,
    'overrides': {
        'containerOverrides': [
            {
                'name': awsContainerName,
                'memoryReservation': 500,
            },
        ],
    },
}

ecs_operator_args = copy.deepcopy(ecs_operator_args_template)
ecs_operator = ECSOperator(
    task_id='run_ml',
    dag=dag,
    retries=AIRFLOW_ECS_OPERATOR_RETRIES,
    retry_delay=timedelta(seconds=10),
    **ecs_operator_args
)
The ‘# DAG base information’-part of the DAG-file determines the actual schedule Airflow will use to run the Talend job. In our example we use the ‘@daily’ parameter, but it is also possible to use a CRON-based schedule. Or even ‘None’, if you want to manually start the DAG.
For more information about the DAG: https://airflow.apache.org/docs/apache-airflow/stable/concepts/dags.html
That is it! You can open the UI to view the progress of the execution or to manually start the DAG.
If there are unhandled error that Airflow does not pick up, you can check the Cloud watch logs that are linked to the Airflow instance.