Introduction
As you probably know, Talend is entirely based on a simple concept called “components”. These components can be described as functional pieces to a puzzle, which are graphically represented in the shape of an icon. The puzzle itself is a Talend job, where you perform numerous actions to your own liking. These actions can be achieved by dragging certain components from the Palette to the job canvas. For example, the tFileInputExcel allows you to read a specific Excel file as well as extract the data contained within that file.
Custom Components
Even though there is a vast amount of Talend components available, sometimes you might need to perform an action that none of these components can offer. That’s where the creation of custom components comes into play. You can create custom components to fulfil an action based on your own specific needs. Well, the main subject of this tutorial is the process of creating such a custom component from start to finish. Please, keep in mind that this is just a single possible approach!
The reason why this tutorial was brought to life is the fact that there isn’t that much information available on this subject. The basic tutorial which is provided by Talend in the knowledge base is incredibly short and incoherent. It doesn’t even come close to providing the whole package of information that is required to actually create a custom component. This tutorial sets the record straight. And for an even more in-depth explanation of component creation I’d like to refer to the following link. The explanation itself is provided by a BI consulting company called PowerUp.
Four Individual Parts
This tutorial includes four individual parts. In this first part, I will handle the basics of component creation. It won’t include any practical examples just yet. The other three parts will be revealed later on.
Requirements
In order to follow and complete this tutorial, there are a few basic requirements:
- You need a working distribution of Talend Open Studio. The preferred environment is Talend Open Studio for Data Integration because of its simplicity and straightforward design. Any version above 4.2.3 will do.
- In order to fully understand this tutorial basic Java knowledge is required. You need to be able to read, write and interpret Java code.
Location and associated files
Whenever Talend is installed on your local file system, the following dedicated directory is present:
<Talend Studio installation dir>/plugins/org.talend.designer.components.localprovider _ /components/.
This directory holds all available standard Talend components in separate subfolders. Each subfolder has its own specific name, which corresponds to the name of a component.
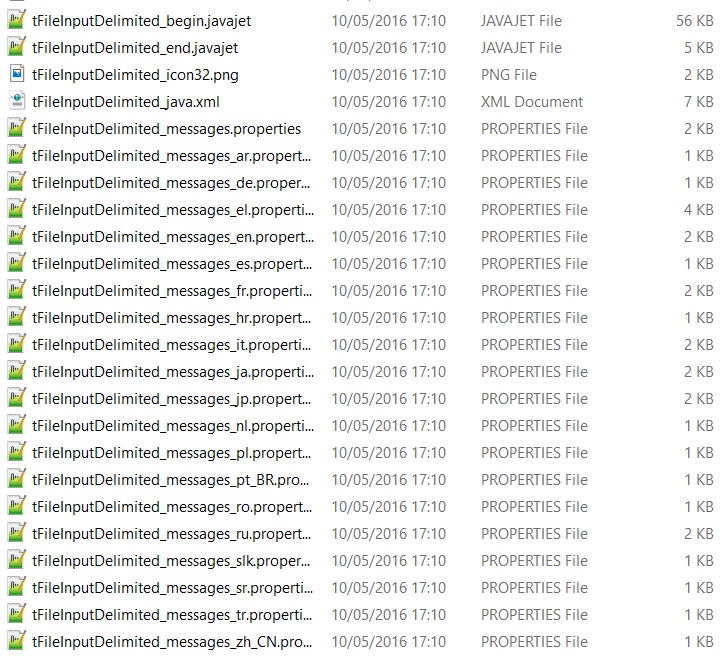
If you open one of these subfolders, for example tFileInputDelimited, you’ll notice it consists of the following files:
- A few JET (Java Emitter Template) files
- Message property files
- An image file containing the icon associated with the component that is shown in the Palette. This image must have a size of 32*32 and the type has to be PNG.
- An XML descriptor file
JET/template file
This type of files allows you to generate text output based on a certain EMF model. In Talend these files are used to generate Java output code, which you then deploy and compile inside a job. The file consists of two types of code: template code and Java output code. You recognize the template code by looking for “<% %>” tags.
Message property file
In a message property file, you define the display names or labels for the properties of a certain component. These properties are actually variables that are present in the JET files. Furthermore, this file contains a description for the component (LONG_NAME). This label is a tooltip of the component. This tooltip is shown whenever you mouse over it in the Palette.
XML descriptor file
An XML descriptor file, in this case, describes how a component should be deployed. Within the XML structure you find all the information required to define a component, such as the attributes belonging to the component, configuration requirements, interaction with other components, etc.
Technical details
In essence, a component within a Talend job consists of generated Java output code in the form of a snippet. The generated Java output code originates from the template (JET) files. Whenever you drag a component to the job canvas and save the actual job, the Java code is compiled automatically. A job itself is a Java class. Whenever a component is added to a job, the code of the job changes dynamically. Whenever a connection is made with another component or a parameter of a component is modified, the code changes as well. It’s all perfectly linked together!
Please note that parameters of a component are only visible to the template. The template basically transforms the parameters into string constants. These constants are then inserted in the Java output code whenever, as well as where they’re needed. So, whenever you modify parameter values of a certain component, the Java code of a job changes thanks to the template.
Summary
The process that was previously explained can be summarized into the following steps:
Parameters are defined
⇩
Templates take care of the changes and pass the values
⇩
Java output code changes based on the values that were passed by the templates
⇩
The Talend job consists of the Java output code and is ready to be run with the latest changes
Sections of a component
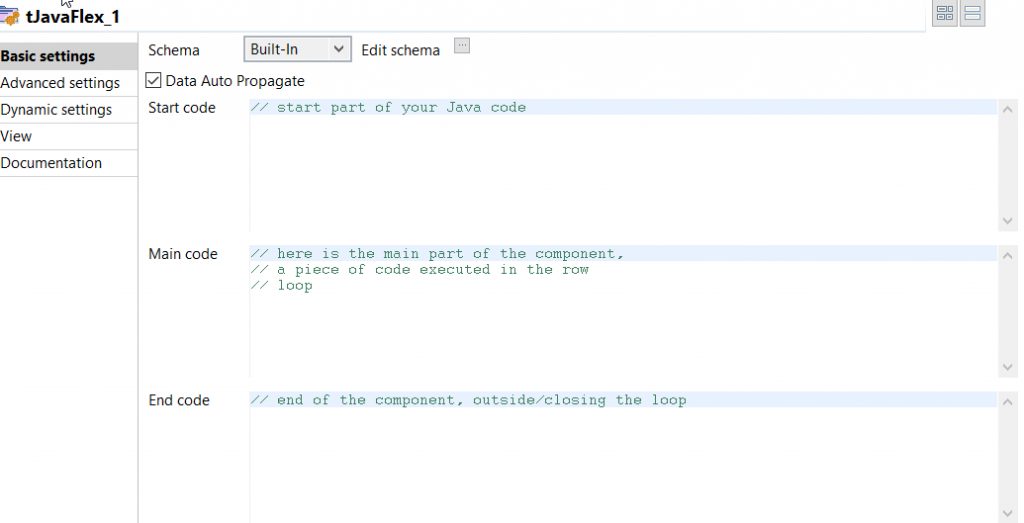
A component usually consists of three different sections: begin, main and end. It’s perfectly possible to use only one section or two sections but you’ll notice that most components have all three sections defined. Each of these sections will generate a separate piece of Java output code, that will be added to the Java output code of a certain Talend job. Remember the JET/template files I’ve mentioned before? Well, these sections are the actual templates and each template has a dedicated file.
If you’ve worked with Talend and its components before, you might be familiar with the concept of these sections already. In this context, one component in particular, namely the tJavaFlex component, might ring a bell. If you look at its basic settings, all of the previously mentioned sections are present.
tJavaFlex
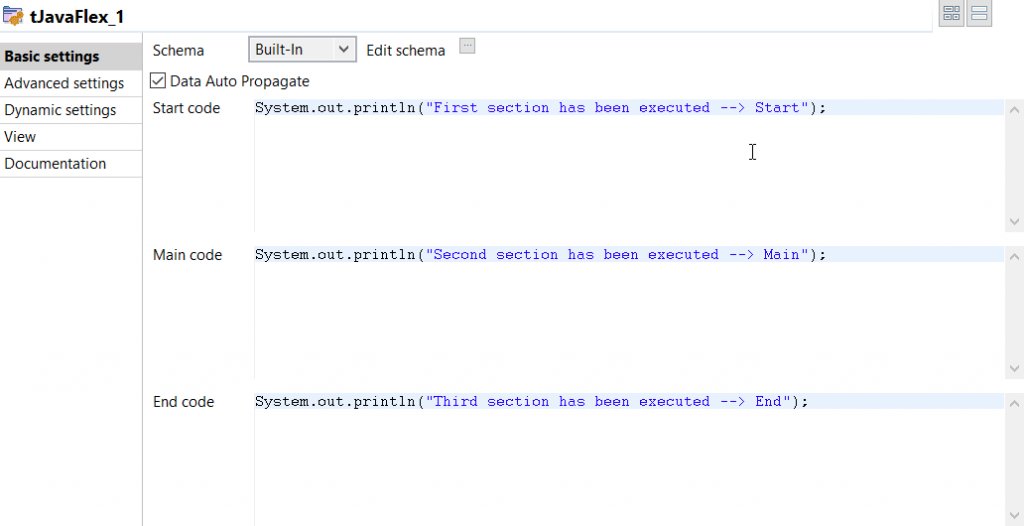
However, this component doesn’t operate the same way as the templates do within a custom component. You basically just write code in the sections and it’ll be immediately added to the Java output code without any transformations. It’s quite simple to figure out that these sections are executed in chronological order. First the start, then the main and ultimately the end section. To be able to see this happen up close, you create a random Talend job and drag a tJavaFlex component to the job canvas. After that, you insert the following code snippets in the appropriate sections:
System.out.println("First section has been executed --> Start");
System.out.println("Second section has been executed --> Main");
System.out.println("Third section has been executed --> End");
Run the job and, as expected, the following output is printed on the console:
Initial steps of component creation
There are two possible ways to create your own custom components. You either do it manually or you use a dedicated wizard. Talend Open Studio includes a graphical interface, called the “Component Designer”, which is specifically designed for the creation of components. This interface includes the previously mentioned wizard. Personally, I think that the Component Designer adds a lot of initial junk code to the various files when using the wizard to create a component. For this reason, I prefer to create custom components manually. That is, of course, a personal choice.
Let’s get things started!
Before creating an actual component, Talend requires a specific folder to be created somewhere on your local file system. All of the custom components you’re going to make, will be stored in this folder. So, go ahead and create that folder. I’ve called mine “Custom_Components”.
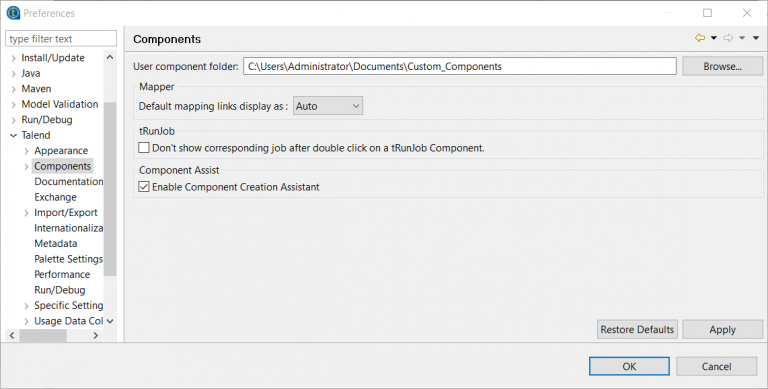
Once the folder has been created, Talend requires its location to be known. In order to do that you have to open your Talend Open Studio and perform the following tasks:
- Go to Windows ➞ Preferences ➞ Talend ➞ Components
- In the blank space next to “User component folder” enter the path to the folder you’ve just created
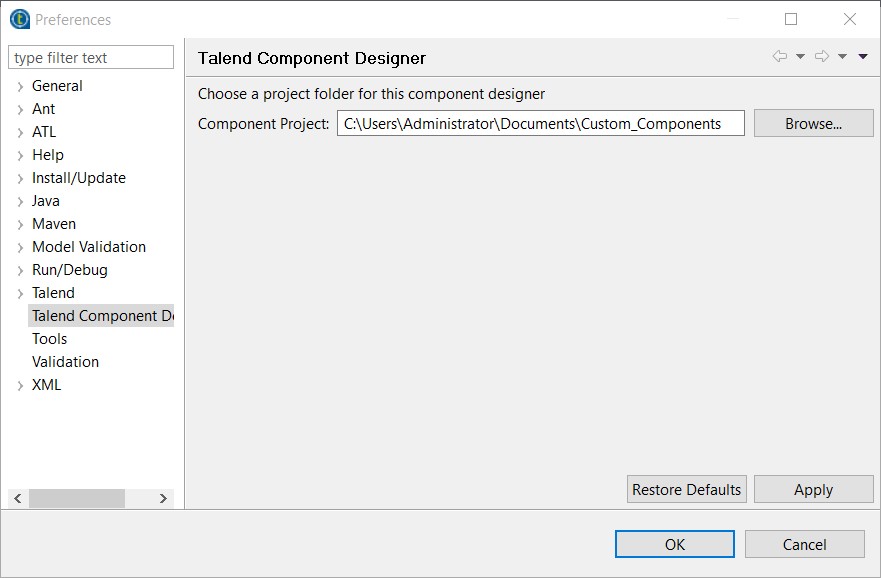
We’ll also be using the Component Designer. This interface requires the location of the created folder to be known as well. In order to do that you need to perform the following tasks:
- Go to Windows ➞ Preferences ➞ Talend ➞ Talend Component Designer
- In the blank space next to “Component Project” enter the path to the folder you’ve just created
Everything is now in place
If you’re using Talend Open Studio for Data Integration, there should be two perspectives available in the top right corner. During this tutorial you’ll be switching between these two perspectives. Please click on the desired perspective to switch right to it. If, for some reason, one of these perspectives isn’t showing up, you click on the small icon to the left and select the perspective from the list which pops up.
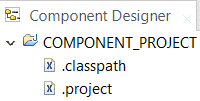
Let’s go to the Component Designer perspective. Initially, you haven’t created a component yet so there aren’t any subfolders available. However, you should see the following:
The “COMPONENT_PROJECT” folder is the root folder in the Component Designer perspective. This is a representation of the folder you’ve previously created somewhere on your file system. In this specific folder you’ll create subfolders which correspond to your own custom components.
That’s it for now! In the next part we’ll get to work and create our first component!
Download the full tutorial here
Used sources:
- http://www.talendbyexample.com/talend-custom-component-xsd.html
- http://www.powerupbi.com/talend/componentCreation_1.html
- https://help.talend.com/display/KB/What+is+a+Talend+component
- https://help.talend.com/display/KB/How+to+create+a+custom+component
- http://www.talendbyexample.com/talend-api-for-component-designers.html

